2017 female DIY Christmas gifts
This year I decided to make my Xmas gifts. They feel more personal that way!! I don't have a big family so it is very easy to whip up a few things and be done with everyone on my list. I still have my husband's gift to put together, but I still have time for that. Whereas the others they have to go through the mailing system. And this time of year it can be a nightmare getting your package.


My first gift to the lovely ladies in my family I made these wonderfully crocheted headbands to keep your ears warm. I had unused yarn in my closet because I had gotten too much when I made my husband his scarf for his birthday. I think it's clever to use the craft material you already have when deciding what to make for gifts. I used this tutorial(crochet headband tutorial)up to where she wanted to make the stitch more difficult, but I didn't have time to get flustered by using a new stitch. So I just used the one stitch all the way through.You can see the example on the right headband with wooden keys decor on it. But after that one, I decided to be a little spicier and add the half moon shapes to the end of the others. I love the 1920s and these are inspired by it!! I hot glued my decor items, in case you were wondering. These took me about a half hour to an hour to make.
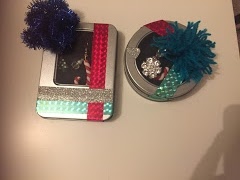
I wish I would have taken pics of the items that I made outside the containers 😅. But if you have some polymer clay these I whipped up very quickly. One is an earing set and the other is a jacket pin. I thought some holiday inspired jewelry could never go wrong. They probably won't be used until next Christmas season but at least then they will be thinking about me 😉💚. I rarely throw cute little containers out so these I had in storage and I made them Christmas themed.

I also love tassels, in fact, I am quite obsessed with them. Ever since I was little the big tassels I love playing with. I have a Pinterest board specifically for tassels. The tutorial is so simple to make these too. These are awesome and you can use them however you like. Such as blinging out your purse, phone, or home decor. Even hang it on your Christmas tree if you like.
Would love to see your DIY gifts!!! Post in the comments, if you have an easy one for me!!
Comments
Post a Comment